Last Updated on: 1st June 2024, 08:44 am

Hot weather making your hydrangea look a bit droopy?
Caring for hydrangeas in hot climates can often feel like trying to keep an ice sculpture from melting at a summer barbecue—challenging, right?
You’ve probably spent countless mornings wondering, “Why can’t my hydrangeas look as lush as the ones on the gardening shows?”
Trust me, you’re not the only one watching your floral dreams drip away with the morning dew.
It’s tough when you pour your heart into your garden; all you get back are drooping leaves and sparse blooms.
Feeling frustrated? Absolutely. But here’s the good news: you’re not fighting this battle with nature alone.
Together, we’ll explore proven strategies and simple adjustments that can turn your hydrangea care from guesswork into mastery, even when the thermometer climbs.
Ready to turn your hydrangea hassles into horticultural triumphs? Let’s jump in!
Understanding Hydrangeas
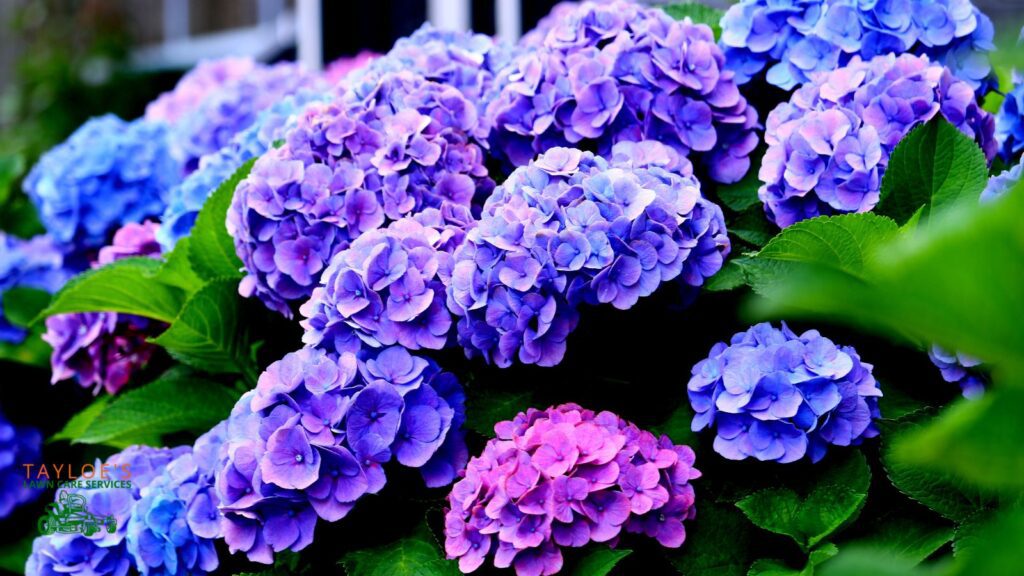
Hydrangeas are not just any garden flower; they’re the divas of the plant world, flaunting their large, vibrant blooms that can dazzle any onlooker.
But knowing your hydrangeas is like knowing your guests—what delights one might distress another.
If you’re gardening in a hot climate, picking the right variety isn’t just a matter of preference; it’s essential for survival and flourishing.
Here are the top picks for hydrangeas that excel in hot climates, ensuring not just survival but vibrant growth and blooming:
- Panicle Hydrangeas (Hydrangea paniculata): These are the sun-lovers of the Hydrangea family.
They love basking in the light and can handle more direct sun and heat than most other types.
Their flowers, which start white and gradually turn to shades of pink or red, bloom on new wood, ensuring they’ll come back vibrant and strong even after a harsh winter or pruning.
- Oakleaf Hydrangeas (Hydrangea quercifolia): Their distinct, oak-shaped leaves boast resilience to heat and unrivaled spectacular fall color.
Their leaves turn brilliant red, bronze, and purple shades as the weather cools, making them a year-round showstopper.
- Smooth Hydrangeas (Hydrangea arborescens): Known for their massive, snowball-like clusters of white flowers, these hydrangeas can do well in both sun and shade.
They’re particularly forgiving and can bounce back from environmental stress, making them a good choice for gardeners who are still honing their green thumb.
How to (Optimally) Plant Hydrangeas
Planting hydrangeas in hot climates requires a bit of foresight and strategy to ensure they thrive.
Here’s how you can give these garden divas the best start:
- Timing is Everything: Plant hydrangeas during the more excellent parts of the year, specifically late fall or early spring. This allows the plants to establish themselves without the stress of midsummer heat, providing a strong foundation before they face intense sun.
- Location: Select a spot in your garden that offers morning sun and afternoon shade. This exposure ensures the plants get enough light for healthy growth and vibrant blooms, protecting them from the more extreme afternoon heat.
- Soil Preparation: Hydrangeas thrive in rich, well-drained soil.
Therefore, work plenty of organic matter, such as compost or aged manure, into your garden soil to help improve its nutrient content and structure and enhance its ability to retain water—a crucial factor in hot climates.
Ensure the soil pH level is to the plants’ liking, slightly acidic to neutral. You can test this out using a home testing kit available at garden centers.
If the pH is too high (alkaline), lower it by adding garden sulfur or aluminum sulfate according to the package instructions. If it’s too low (acidic), apply garden lime to help raise it.
Step-by-Step Guide for the Planting Process
As your hydrangeas patiently wait for you to dig up their new home, thoroughly water them while they’re still in their nursery pots.
This preparation ensures the roots are fully hydrated, which will help them establish more effectively once planted.
- Dig a hole twice as wide as the nursery pot to give the roots ample space to spread.
- Scrape the sides of the hole with your shovel to create a rough texture, encouraging the roots to grow through the soil and establish beyond the initial planting area.
- Gently remove the hydrangea from its pot, carefully loosen any tangled roots, and trim any circling roots to promote healthier growth.
- Place the hydrangea in the hole, ensuring the top of the root ball is level with the surrounding ground, just as it was in the pot.
- Fill the hole with the original dug-out soil, packing it lightly around the roots to eliminate air pockets.
- Thoroughly water the area to settle the soil and hydrate the plant.
- Apply a layer of mulch around the plant, 1 to 2 inches thick, keeping it away from the stem to prevent moisture buildup and potential rot.
- Continue watering your newly planted hydrangeas every 1-2 days, especially under extreme heat or drought conditions. Irrigate early in the morning to allow the leaves and roots ample time to dry before evening, thereby preventing fungal diseases.
Once established, only water when the top inch of soil feels dry to the touch.
How to Care for Hydrangeas
Generally, hydrangeas are easy-to-care-for shrubs as long as their basic needs are met, especially in hot climates with unique challenges.
Here’s your month-by-month guide to keeping your hydrangeas thriving throughout the year:
Monthly Care Guide for Hydrangeas in Hot Climates
January-February:
- Water sparingly, as hydrangeas are mostly dormant during this period. However, keep an eye on moisture levels during particularly dry winters.
- Inspect the plants for any signs of damage or disease from winter conditions and prune any dead or damaged branches to maintain plant health and prepare for spring growth.
March-April:
- Increase watering as temperatures begin to rise and new growth appears.
- Apply a slow-release fertilizer for flowering shrubs to promote healthy leaves and abundant blooms.
- Begin monitoring for pests like aphids, spider mites, and scale insects. A strong water jet can dislodge aphids and spider mites if infestations occur.
For tougher pests like scale, apply horticultural oil. Always test treatments on a small area first.
May-June:
- Continue to keep the soil moist but not waterlogged as the heat increases.
- Use shade cloths to protect plants from midday heat–if they are not planted in naturally shaded areas.
- Check for pests regularly, and treat them with insecticidal soap or neem oil if they persist. Also, monitor the health of your plants and treat any issues promptly to prevent spread.
July-August:
- This is often the peak of heat, so it’s crucial to maintain consistent moisture. Water deeply in the early morning to reduce evaporation losses.
- Consider a second application of slow-release fertilizer at the beginning of July to support continued flowering, especially if your plants show signs of nutrient deficiency.
September-October:
- As temperatures start to drop, reduce watering but ensure the plants are still receiving adequate moisture to prepare for the cooler months.
- Stop fertilization and reduce pruning to only what is necessary for shaping or removing dead foliage to prepare hydrangeas for dormancy.
November-December:
- Water only as needed to prevent the soil from completely drying out, especially in the absence of rainfall.
- Protect your hydrangeas from early frosts by adding extra organic mulch around the base to insulate the roots.
Soil pH Maintenance
Regularly check the soil pH, as fluctuations affect bloom color and plant health. Adjust using sulfur or lime based on your specific soil conditions.
How to Prune Hydrangeas
Understanding when and how to prune your hydrangeas is crucial.
Varieties that bloom on old wood should be pruned in the summer, after their blooming cycle is complete–to avoid cutting off next year’s buds.
Prune up to one-third of old stems, focusing on removing weaker shoots while preserving robust older and newer stems for future blooms.
Hydrangeas that flower on new wood should be pruned in late winter or early spring before growth begins. These should be cut back significantly, sometimes to ground level, to encourage vigorous growth and optimal blooming in the upcoming season.
How to Propagate Hydrangeas
Generally, you can propagate these beauties via stem cuttings or rooting branches directly in the ground.
For stem cuttings:
- In early fall, choose a 6-8 inch stem of new growth, which is lighter green than old growth.
- Using sterilized, sharp pruners, cut below a leaf node, keeping a set of leaves at the top. Remove the bottom leaves and halve the remaining leaves crosswise to reduce moisture loss.
- Dip the cut end into the rooting hormone. Insert the stem into a damp, soil-filled pot (8-10 inches). If desired, place multiple cuttings per pot.
- Cover the pot with a clear plastic bag to maintain humidity, ensuring it doesn’t touch the leaves. Ventilate by making small slits in the bag.
- Position the pot in indirect sunlight and keep the soil slightly moist. Roots should emerge in 2-4 weeks.
For rooting directly in the soil:
- Bend a long branch down to the soil, trimming leaves from the part that will touch the soil. Gently bury the branch segment in the soil without breaking it.
- Hold it in place using a brick or rock. Regularly water the branch like the main plant.
- Periodically test for roots by gently tugging. Once rooted, detach the new shrub from the parent plant to allow independence.
- If relocating, wait several weeks post-separation before moving the new shrub to strengthen it for the transplant.
This method works well if you want to fill empty spaces in your garden.
Common Hydrangea Growing Issues
Below are a few key issues to watch for and how to manage them:
- Leaf Scorch: The edges of the leaves may turn brown due to excessive heat and sunlight. To prevent this, provide adequate shade during the hottest parts of the day.
Also, consider increasing air circulation around the plants to reduce heat stress.
- Root Rot: This can occur if the soil retains too much moisture. Ensure good drainage by amending the soil with organic matter and checking that the planting area is not prone to standing water.
- Pest Infestations: Stressed plants are more susceptible to pests like aphids and spider mites. Maintain overall plant health and regularly inspect for pests.
Treat infestations early with insecticidal soap or neem oil to prevent spread.
Now You Know How to Care for Hydrangeas in Hot Climates…
You have no reason not to enjoy these summer showstoppers in your garden year-round.
Embrace the challenge, apply these strategies, and prepare to be rewarded with a dazzling display of blooms that will make your garden the envy of the neighborhood.
Do you need help with lawn care, pruning, or other around-the-yard needs? Call Tayloe’s Lawn Care Services, LLC, at 252.287.3376—we can help!
Author Profile

- Maureen Abuor
- Maureen Abuor is a professional content marketing strategist and SEO strategist, with particular knowlege of creating landscaping and gardening content that informs and delights her audience. When she's not working, she's a busy mother of three precious little ones and child of God.
Latest entries
 Lawn CareApril 29, 2025Best shady area grass seed for Eastern NC
 GardeningApril 15, 2025How do I make organic soil for the garden?
 Flower GardenMarch 7, 2025What are wave petunias?
 Flower GardenMarch 3, 202520 Full-sun annuals for your spring and summer garden


